初学css实战 制作登录页面

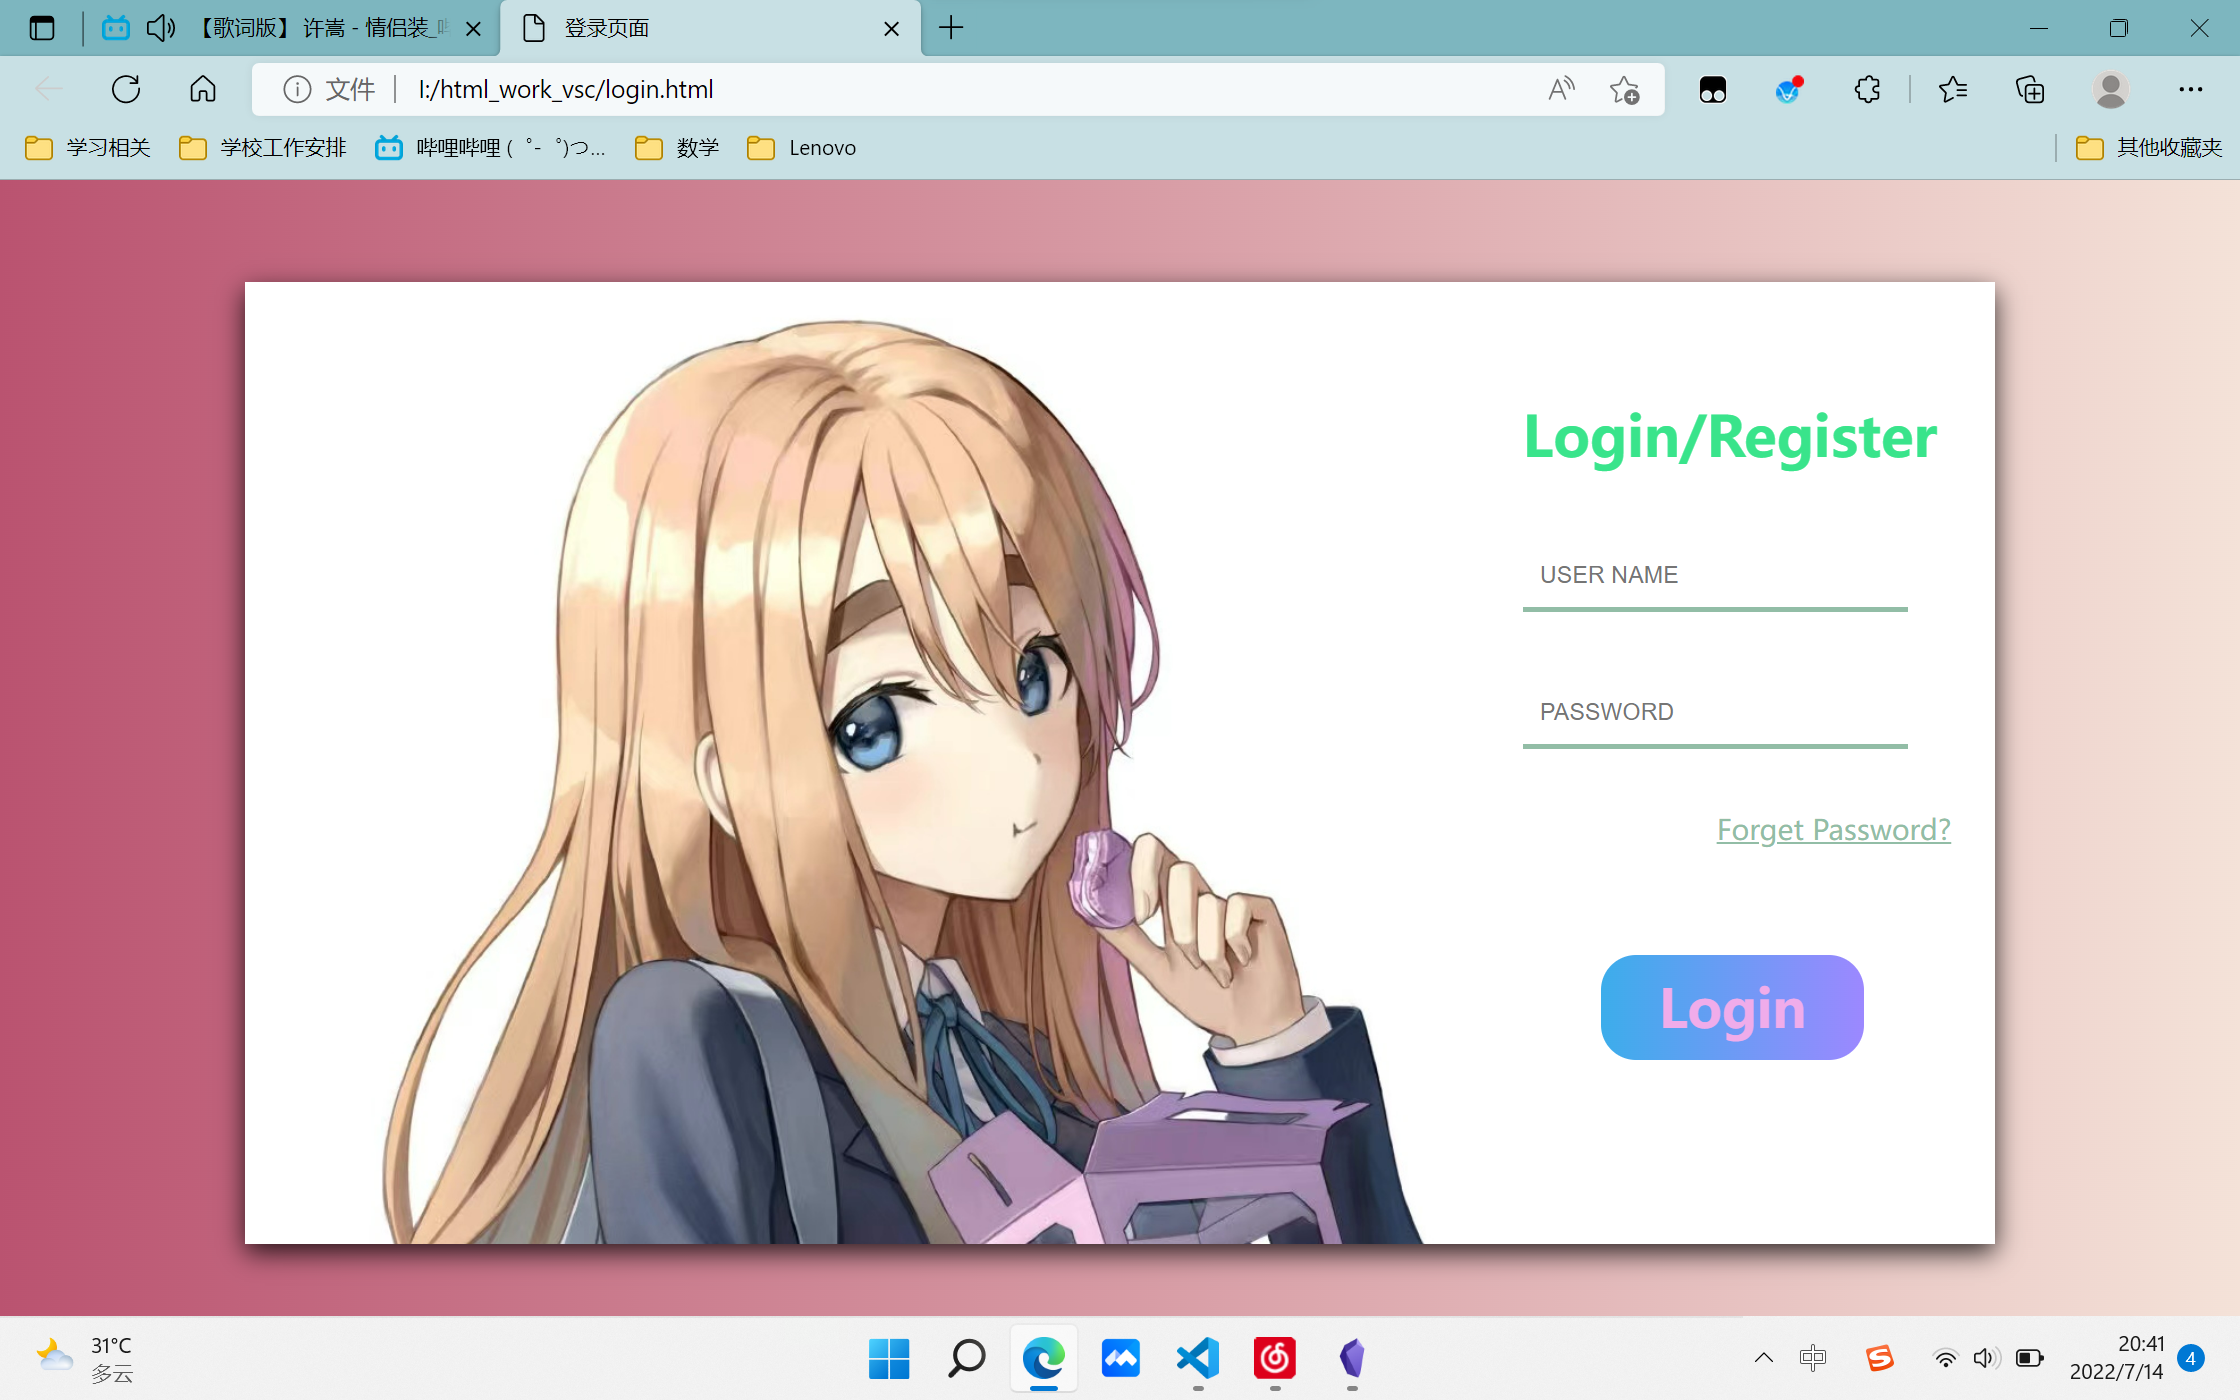
最终效果:

登录界面

代码

HTML部分

1
2
3
4
5
6
7
8
9
10
11
12
13
14
15
16
17
18
19
20
21
22
23
24
25
26
27
28
29
30
31
32
33
34
35
36
37
38
39
40
41
42
43
44
45
46
47
48
<!DOCTYPE html>

<html lang="en">

<head>

    <meta charset="UTF-8">

    <meta http-equiv="X-UA-Compatible" content="IE=edge">

    <meta name="viewport" content="width=device-width, initial-scale=1.0">

    <title>登录页面</title>

    <link href="login.css" rel="stylesheet" type="text/css">

</head>

<body>

    <div class="outbox">

        <div class="pic"></div>

        <div class="rightbox">

            <div class="textbox">

                <h1>Login/Register</h1>

                <input type="text" placeholder="USER NAME" class="inputbox">

                <input type="password" placeholder="PASSWORD" class="inputbox">

                <a href="#" class="forget">Forget Password?</a>

                <a href="#" class="login">Login</a>

            </div>

        </div>

    </div>

</body>

</html>

html部分代码逻辑

  1. outbox是整个大框
  2. pic是放在左边的图片。为什么要用div然后用background来设置,而不用img直接插入呢:是因为我们需要让图片自适应outbox这个框框(使用background-size属性)这种将插入图片作为背景图片进行操作是一种常用方法
  3. rightbox是右边的白框部分(由于插入的图片也是白底,所以这个例子看不太出来)
  4. textbox是所有文字内容合成的框。这样便于整体调整位置,不会每一段文字散开来
  5. 然后给每个部分的文字设置样式(盒模型)

CSS部分

1
2
3
4
5
6
7
8
9
10
11
12
13
14
15
16
17
18
19
20
21
22
23
24
25
26
27
28
29
30
31
32
33
34
35
36
37
38
39
40
41
42
43
44
45
46
47
48
49
50
51
52
53
54
55
56
57
58
59
60
61
62
63
64
65
66
67
68
69
70
71
72
73
74
75
76
77
78
79
80
81
82
83
84
85
86
87
88
89
90
91
92
93
94
95
96
97
98
99
100
101
102
103
104
105
106
107
108
109
110
111
112
113
114
115
116
117
118
119
120
121
122
123
124
125
126
127
128
129
130
131
132
133
134
135
136
137
138
139
140
141
142
143
144
145
146
147
148
149
150
151
152
153
154
155
body {

  background-image: linear-gradient(to right, #ba5370, #f4e2d8);

  /*严格来说background-image要做浏览器兼容*/

  display: flex; /*将整个body定义为一个flex容器*/

  justify-content: center; /*将flex项目在容器中心对齐*/

}

.outbox {

  /*定义为弹性布局*/

  display: flex;


  /*规定定位类型*/

  position: relative;

  top: 50px;

  width: 1000px;

  height: 550px;


  /*其他效果*/

  box-shadow: 0 5px 15px rgba(0, 0, 0, 0.8);

}

.pic {

  background-image: url(pic/side4.jpg);

  width: 700px;

  height: 550px;

  /*把背景图像扩展至足够大,以使背景图像完全覆盖背景区域。*/

  background-size: cover;

}

.rightbox {

  display: flex;

  justify-content: center; /*将felx项目--即下面的textbox在容器的水平中心*/

  align-items: center; /*将felx项目--即下面的textbox在容器的竖直中心*/


  width: 300px;

  height: 550px;

  background-color: white;

}

.textbox {

  position: relative;

  top: 20px;

  width: 300px;

  height: 500px;

}

.textbox h1 {

  margin-left: 30px;

  font: Garamond 900 35px ""; /*Garamond是字体 900是字体加粗允许值*/

  color: #39e48b;

}

.textbox .inputbox {

  /*按照box的元素从内到外设计*/

  width: 200px;

  padding: 10px;

  margin: 20px 30px;

  border-style: none;

  border-bottom: 3px solid #92bda6;

}

.forget {

  font: 12px;

  color: #92bda6;

  float: right;

  margin: 15px 25px; /*微调位置*/

}

.login {

  display: block;

  /*定位*/

  position: absolute;

  bottom: 100px;

  margin-left: 75px;

  /*盒子样式*/

  background-image: linear-gradient(to left, #9c88ff, #3cadeb);

  width: 150px;

  height: 60px;

  border-radius: 20px;

  /*文字样式*/

  font: 900 30px "";

  text-decoration: none; /*取消下划线*/

  text-align: center;

  line-height: 60px;

  color: #f0acea;

}

注意看里面的注释,实现逻辑在里面

感受

  1. 这个例子是参考了b站一位up的视频参考视频,适合自己学习进度的例子很能帮助自己理解知识。
  2. 在参考过程中最好是自己先过一遍代码,然后自己写,不会的再参考。一定不能照抄,要认真体悟示例的逻辑之后有自己的实现逻辑
  3. 途中发现html的div内嵌套div的代码缩进是有语法意义的,当时查了半天找不到bug原因,如果下次有莫名的样式无法应用问题,可以看看是不是打代码时候缩进错了
  4. 审美也是一大关啊,现在配色全靠直觉
  5. flex布局还需要深入体悟
  6. 各种选择器必须要实战运用才行!

初学css实战 制作登录页面
http://sample.com/2022/07/14/登录界面/
作者
LuoYutong
发布于
2022年7月14日
许可协议